

Building the Ultimate Overlanding Sound System: Audio Tips for Long Hauls
Overlanding audio systems must handle long drive times, vibration, dust, temperature changes, and limited electrical capacity. System planning matters more than maximum output.
Use this process to select, install, and tune a reliable setup.
1. Define the System’s Use
Start with the vehicle and listening locations.
Identify:
- Vehicle type.
- Available mounting locations.
- Cargo space requirements.
- Daily listening time.
- Highway and trail noise levels.
- Camp-side listening needs.
- Existing alternator and battery capacity.
- Exposure to water, dust, and direct sunlight.
A closed SUV or truck cab can use standard automotive components in protected locations. An open UTV or exposed truck-bed installation requires weather-resistant equipment and protected wiring.
If the system will play outside the vehicle, do not rely only on opening the doors. Use components designed for outdoor exposure or a separate speaker zone with secure mounting.
2. Select the Main Components
A balanced overlanding system normally includes:
- Source unit or factory-radio integration.
- Front speakers.
- Rear speakers, if needed.
- One subwoofer.
- Speaker amplifier.
- Subwoofer amplifier or multi-channel amplifier.
- Signal cables.
- Power and ground cables.
- Fuse holder and fuses.
- Speaker adapters or custom enclosures.
- Sound-deadening material.
- Protective wire loom and grommets.
Start with the front speakers. They provide most of the detail heard from the driver’s seat. Add a subwoofer after the front stage is selected.
A large subwoofer is not always practical for an overland vehicle. Cargo space, enclosure volume, amplifier demand, and battery load must be considered together. A shallow-mount subwoofer or compact enclosure can provide usable bass without removing storage space.
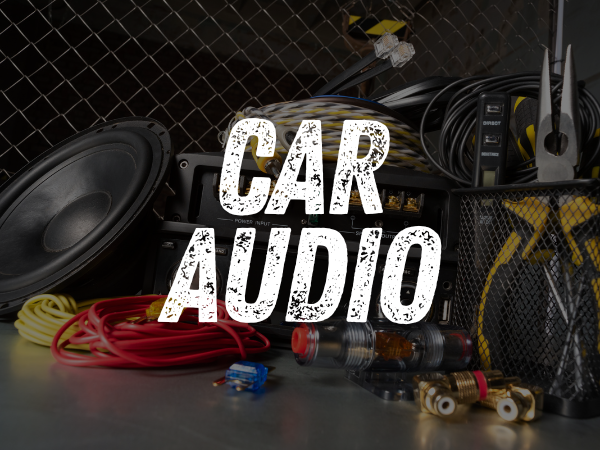
DIY Customs Store carries car audio speakers, subwoofers, and enclosures for custom vehicle layouts.
3. Match Speakers and Amplifiers
Check these specifications before ordering:
- RMS power.
- Nominal impedance.
- Sensitivity.
- Mounting depth.
- Cutout diameter.
- Enclosure requirements.
- Weather-resistance rating.
- Amplifier channel count.
- Amplifier output at the intended impedance.
Use RMS ratings for system planning. Do not use peak power as the main matching measurement.
The amplifier must support the speaker impedance. A lower-than-supported impedance can cause overheating or protection shutdown.
For a basic system:
- Use a two- or four-channel amplifier for the main speakers.
- Use a mono amplifier for the subwoofer.
- Use a multi-channel amplifier when space is limited.
- Use a marine-rated amplifier when installation conditions are exposed to water or heavy moisture.
DIY Customs Store offers entertainment amplifiers from brands including JL Audio, Wet Sounds, Fusion, Hertz, Memphis Audio, and Audison.
Do not select an amplifier only because it has a high wattage number. Confirm its output at the actual speaker impedance and verify the electrical system can support the load.
4. Plan Electrical Capacity
Audio demand increases with amplifier output. Long periods of parked listening can drain the starting battery.
Before installation, inspect:
- Battery condition.
- Alternator output.
- Factory ground cables.
- Battery-to-chassis ground.
- Engine-to-chassis ground.
- Existing accessory loads.
- Dual-battery or auxiliary-battery equipment.
A high-output system may require upgraded power and ground paths. A secondary battery can help when listening at camp, but it requires proper isolation and charging equipment.
Disconnect the negative battery terminal before wiring.
Run the main power cable through a suitable firewall opening. Install a grommet when passing through metal. Place the main fuse close to the battery, usually within 6 to 12 inches of the positive terminal.
The fuse protects the power cable if it shorts against the chassis. Select the fuse according to the cable and system requirements. The amplifier’s built-in fuse does not protect the entire cable run from the battery.
Use the same general cable size for power and ground. Attach the ground to clean, bare chassis metal. Keep the ground cable short.
5. Protect the Wiring
Off-road travel creates movement and abrasion. Secure all wiring before replacing panels.
Use:
- Split loom.
- Rubber grommets.
- Heat-shrink tubing.
- Waterproof connectors where required.
- Cable clamps.
- Strain relief.
- Protected distribution blocks.
- Sealed fuse holders.
Keep wiring away from:
- Exhaust components.
- Driveshafts.
- Steering components.
- Hinges.
- Seat tracks.
- Sharp metal edges.
- Water drainage paths.
- High-heat areas.
Separate RCA or signal cables from the main power cable when possible. This can reduce unwanted noise.
Label each cable at both ends. Record speaker polarity, amplifier channels, fuse sizes, and crossover settings. This reduces service time later.
6. Secure Components Against Vibration
Loose equipment can damage itself and the vehicle.
Mount amplifiers to a rigid surface. Use suitable fasteners and avoid mounting an amplifier directly to a vibrating subwoofer enclosure.
Choose a location that is:
- Dry.
- Ventilated.
- Serviceable.
- Protected from cargo movement.
- Away from direct water spray.
- Away from excessive heat.
Leave clearance around the amplifier for airflow. Do not cover the cooling fins or place the amplifier inside an unventilated sealed compartment.
For exposed systems, use marine-rated components where appropriate. Marine products are designed for conditions such as moisture, UV exposure, and salt air. They still require correct mounting and wiring protection.
DIY Customs Store also carries marine audio equipment for applications that require additional environmental protection.

7. Reduce Road Noise and Panel Rattles
Overlanding vehicles produce more road, tire, suspension, and cargo noise than standard street vehicles.
Sound-deadening material can reduce:
- Door-panel vibration.
- Trim rattles.
- License-plate noise.
- Subwoofer enclosure vibration.
- Metal-panel resonance.
Apply material to the outer and inner door skins where accessible. Confirm that window mechanisms, drains, airbags, and service openings remain clear.
Use foam tape or suitable anti-rattle material at contact points between trim panels. Secure loose tools, recovery equipment, and cargo before judging the system’s sound.
Do not use excessive bass boost to overcome road noise. Improve installation, speaker placement, and midrange clarity first.
8. Check Polarity Before Final Assembly
Connect positive to positive and negative to negative on every speaker.
Check the wiring at:
- The source unit.
- The amplifier.
- Any distribution point.
- Each speaker terminal.
One speaker wired out of phase can reduce bass and affect stereo imaging. Verify polarity before closing the panels.
Use the speaker labels and vehicle wiring documentation. If needed, perform a brief polarity test with a small battery and confirm that all speakers move in the same direction. Disconnect the speaker from the amplifier before using this test.
9. Set Initial Crossovers
Use these settings as a starting point:
- Front speaker high-pass filter: approximately 80 Hz.
- Rear speaker high-pass filter: approximately 80 Hz.
- Subwoofer low-pass filter: approximately 80 Hz.
- Bass boost: off.
- Equalizer: flat.
- Loudness enhancement: off.
Adjust based on speaker size, enclosure design, vehicle noise, and personal preference.
A higher high-pass setting can reduce stress on small door speakers. A lower setting may work with larger speakers installed in a properly treated door.
If the subwoofer sounds detached from the front speakers, adjust the crossover frequency, phase, level, and placement. Make one change at a time.

10. Tune for Long Listening Sessions
Set the source unit to a clean listening level below its maximum output. Keep the source EQ flat during initial gain adjustment.
Set amplifier gains gradually. Stop when distortion becomes audible. Gain is not a volume control. Excessive gain can create clipping and increase the risk of speaker damage.
For long drives:
- Keep vocals clear.
- Limit harsh treble.
- Avoid excessive bass boost.
- Use moderate subwoofer output.
- Check for panel rattles.
- Recheck amplifier temperature.
- Confirm that the system does not affect vehicle starting performance.
Use familiar tracks with vocals, bass, and steady instruments. Tune while seated in the normal driving position.
11. Test Before the Trip
Complete these checks before leaving:
- Confirm all speakers play.
- Confirm left and right channels.
- Confirm front and rear balance.
- Check polarity.
- Check amplifier ventilation.
- Inspect the main fuse.
- Test the remote turn-on function.
- Check cable clearance.
- Tighten mounting hardware.
- Inspect exposed connectors.
- Test the system with the vehicle moving.
- Monitor battery voltage during extended parked use.
Carry spare fuses and basic wiring tools. Keep amplifier and speaker documentation with the vehicle records.
Order Components Nationwide
DIY Customs Store serves automotive enthusiasts in all 50 states. Shop online at diycustoms.store for car audio speakers, amplifiers, subwoofers, enclosures, marine audio equipment, and installation components.
In-stock orders placed Monday through Friday before 2 p.m. Eastern generally ship the same day. Orders over $200 qualify for free shipping in the continental United States. Contact DIY Customs Store for fitment questions, system planning, or special-order assistance.
Check the outlet clearance collection for discounted scratched, dented, used, returned, and end-of-life products from premium brands.
SEO Keywords
overlanding sound system, overland car audio, off-road audio system, truck audio upgrade, car audio installation, vehicle speaker upgrade, marine-rated car audio, subwoofer for overlanding, amplifier installation, long-haul vehicle audio
Meta Description
Plan a reliable overlanding sound system with advice on speakers, amplifiers, subwoofers, wiring, battery capacity, vibration control, weather protection, and tuning.
Excerpt
Use this guide to plan an overlanding audio system for long drives, trail conditions, and camp-side listening. Review component selection, power wiring, installation protection, and tuning steps before ordering.