

Marine Electronics Winterization Guide: Protecting Your Boat Audio & Safety Gear
Winter storage can expose boat electronics to moisture, corrosion, freezing temperatures, and battery drain. Use this checklist before placing the boat in storage.
1. Back Up Electronics Data
Save important data before disconnecting equipment.
Back up:
- Waypoints
- Routes
- Tracks
- Chart data
- System settings
- Custom audio settings
- Device configuration files
Use a microSD card, USB drive, or manufacturer-supported mobile application.
Store memory cards in a dry indoor location with the related equipment.
For additional marine electronics maintenance information, review this marine electronics care guide from Discover Boating.
2. Turn Off Power
Turn off the battery master switch before disconnecting equipment.
Then switch off circuit breakers that supply:
- Marine stereos
- Amplifiers
- Speakers with powered lighting
- Chartplotters
- Fish finders
- VHF radios
- AIS equipment
- Radar
- NMEA 2000 networks
- Remote controls
- Network hubs
Some systems continue drawing power after the main equipment is turned off. Disconnecting the circuits prevents parasitic battery drain.
Do not disconnect security equipment if it requires continuous power. Follow the security system instructions.
3. Remove Detachable Equipment
Remove equipment that can be stored indoors.
Prioritize:
- Removable displays
- Handheld radios
- Portable speakers
- Wireless remotes
- Navigation cards
- Processors
- Detachable control panels
- Internal batteries
Store equipment in a dry, stable-temperature area. Avoid unheated garages if temperatures may fall below the equipment’s rated storage range.
Check each owner’s manual. Operating temperature and storage temperature specifications may differ.
Keep equipment away from:
- Direct sunlight
- Condensation
- Fuel vapors
- Chemicals
- Excessive heat
- Uncontrolled humidity
4. Label Cables Before Removal
Label each cable before disconnecting it.
Use labels for:
- Power cables
- Speaker wires
- Antenna cables
- Network cables
- Transducer cables
- Remote-control cables
- Amplifier signal cables
Take photos before removing connections. Include the entire installation and close-up images of each connector.
Secure disconnected cables so they do not hang, chafe, or collect water. Protect exposed cable ends with weatherproof caps or suitable electrical tape.
Do not seal moisture inside a connector. Dry the connector first.
5. Clean Marine Audio Equipment
Salt, dirt, sunscreen, and moisture can damage marine audio equipment during storage.
Use this process:
- Turn off the equipment.
- Remove loose dirt.
- Use fresh water on a damp microfiber cloth.
- Clean the surface without flooding the unit.
- Use mild soap only when required.
- Dry the equipment with a clean microfiber cloth.
- Install the manufacturer’s cover.
Do not use:
- Pressure washers
- Paper towels
- Bleach
- Ammonia-based glass cleaners
- Harsh solvents
- Abrasive cleaners
- Citrus cleaners unless approved by the manufacturer
Do not press hard on screens or control panels.
Fixed marine audio equipment should remain dry and covered. Remove detachable equipment when practical.

Browse the DIY Customs Store marine audio collection for marine entertainment components and accessories.
6. Inspect Speakers and Amplifiers
Inspect every speaker and amplifier before storage.
Check for:
- Loose terminals
- Corroded connectors
- Damaged grills
- Torn surrounds
- Cracked housings
- Water inside enclosures
- Pinched wires
- Exposed copper
- Loose mounting hardware
Do not leave speaker wiring in standing water or damp bilge areas.
If an amplifier is installed in a locker, confirm that the area is dry and ventilated. Do not cover an amplifier while it is operating. During storage, follow the manufacturer’s instructions for covers and ventilation.
An external speaker can support communication equipment in a fixed installation. The Icom External Speaker SP24 is listed by DIY Customs Store with a 4-inch design, 4-ohm impedance, and 7-watt maximum input power. Verify fitment and wiring before ordering.
7. Protect Connectors From Corrosion
Inspect all exposed plugs and terminals.
Look for:
- Green or white corrosion
- Bent pins
- Loose contacts
- Cracked insulation
- Water entry
- Chafed cable jackets
Clean and dry the connection before applying dielectric grease. Apply the product according to the connector and equipment manufacturer’s instructions.
Protect unused connectors with caps where available.
Inspect:
- Antenna bases
- VHF connections
- Speaker terminals
- Amplifier terminals
- Battery cables
- Network connectors
- Transducer connections
- Fuse holders
- Ground connections
Do not apply grease to a connection if the equipment manufacturer prohibits it.
8. Store Safety Equipment Correctly
Safety equipment requires separate inspection and storage.
Remove portable equipment from the boat when possible. Store it in a dry location and keep it accessible.
Inspect:
- Life jackets
- Throwable flotation devices
- Handheld radios
- Emergency lights
- Signaling equipment
- Whistles
- Flares
- First-aid supplies
- Emergency beacons
Check expiration dates and replace damaged items.
Do not store flotation equipment compressed under heavy objects. Allow it to dry completely before storage.
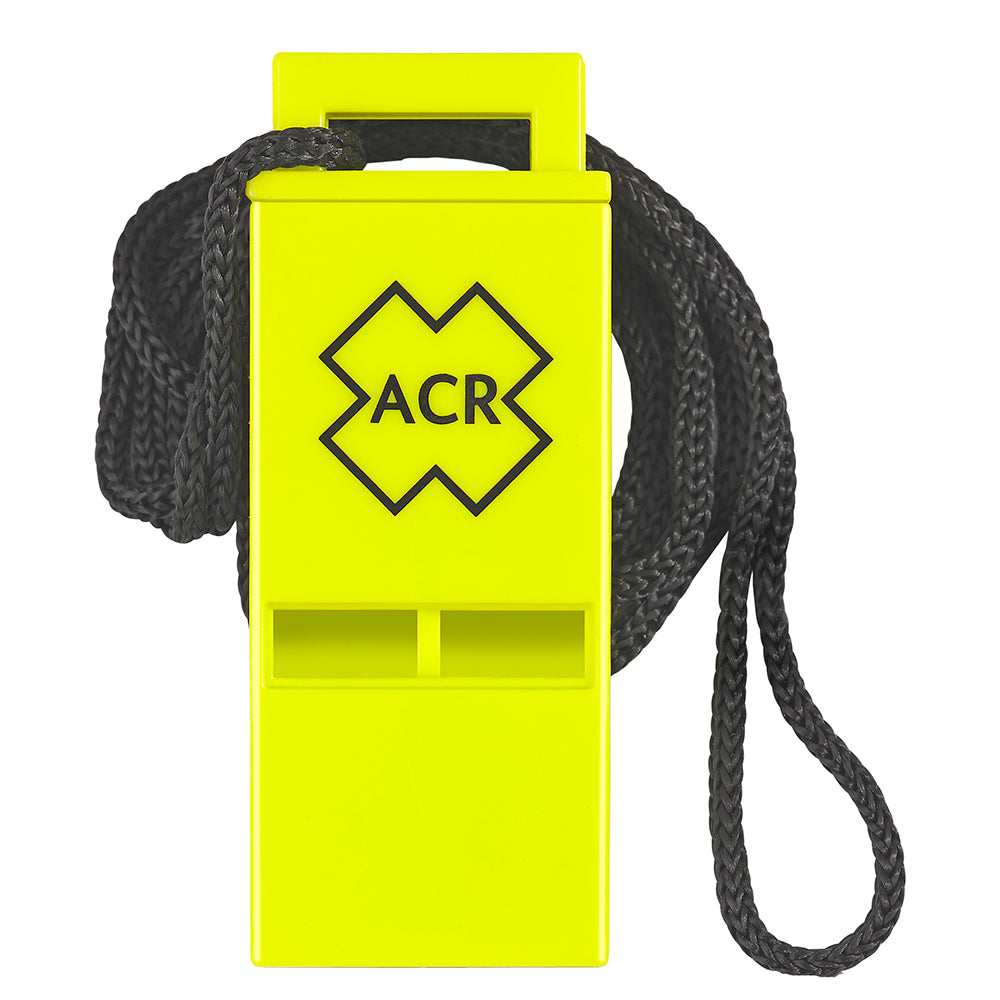
The ACR Survival Res-Q Whistle with Lanyard is listed by DIY Customs Store as a compact dual-tone whistle with a lanyard. The product page states that it is designed for boat and land rescue use and meets USCG/SOLAS requirements. Confirm current local requirements and product instructions before use.
Do not use winter storage as a substitute for required onboard safety equipment. Review applicable federal, state, and local boating requirements before launch.
9. Maintain Batteries
Fully charge batteries before storage.
Inspect:
- Battery cases
- Terminals
- Cables
- Hold-downs
- Vent caps
- Fluid levels on serviceable flooded batteries
Clean corrosion from terminals using the approved method. Apply corrosion protection after the terminals are clean and dry.
Remove batteries when the boat design and storage conditions allow it. Store them in a cool, dry location on a compatible smart maintainer.
If batteries remain onboard:
- Turn off unnecessary circuits.
- Disconnect nonessential loads.
- Charge the batteries fully.
- Use a compatible maintenance charger.
- Check the system periodically.
- Keep charging equipment dry and ventilated.
Follow charger, battery, and boat manufacturer instructions. Do not use damaged batteries or chargers.
10. Control Moisture
Moisture causes corrosion, mold, and equipment failure.
Before covering the boat:
- Dry the cabin.
- Remove wet cushions.
- Open storage lockers.
- Check bilges.
- Inspect for leaks.
- Leave approved vents open.
- Place moisture absorbers near the helm.
- Keep wiring harnesses off wet surfaces.
- Use a breathable boat cover when appropriate.
Do not block equipment vents or breathing valves. Do not seal damp equipment under shrink wrap.
A tight, nonventilated cover can trap condensation. If shrink wrap is used, remove sensitive displays and portable electronics first. Avoid applying excessive tension around antennas, radar units, and other mounted equipment.
11. Inspect Transducers and Sensors
Clean transducers before storage.
Check:
- Mounting hardware
- Sealant
- Cable entry points
- Hull leaks
- Marine growth
- Cracked housings
- Cable damage
If an in-hull transducer uses a liquid reservoir, check the fluid type and level. Use only the fluid specified by the equipment manufacturer. Some systems require non-toxic marine-grade propylene glycol to prevent freezing.
Do not activate equipment outside the water unless the manufacturer permits it. Some sonar equipment can be damaged when operated without proper water contact.
12. Schedule a Spring Inspection
Create a removal and installation record before storage.
Record:
- Equipment location
- Cable labels
- Battery connections
- Fuse ratings
- Software versions
- Memory card locations
- Serial numbers
- Visible damage
- Required replacement parts
At spring commissioning:
- Inspect for water damage.
- Check for rodents and damaged wiring.
- Reinstall equipment.
- Reconnect labeled cables.
- Confirm battery voltage.
- Inspect fuses and breakers.
- Power up each system separately.
- Test audio output.
- Test VHF and emergency equipment.
- Check navigation and transducer functions.
- Install software updates.
- Confirm stored data.
Test safety equipment before the first trip. Replace expired or damaged items.
DIY Customs Store serves customers in all 50 states with nationwide shipping. Order marine audio accessories and marine safety equipment online at diycustoms.store. Orders over $200 qualify for free shipping. The outlet clearance section includes scratched, dented, used, returned, and end-of-life products from premium brands such as Linkswell, Fusion, Hertz, Wet Sounds, and others. Review product condition before ordering.
Contact DIY Customs Store for product and installation questions. DIY Customs Store is headquartered in Pittsburgh and serves automotive and marine customers nationwide.
Winterization Checklist
- Back up navigation and system data.
- Turn off circuit breakers and master switches.
- Remove portable electronics.
- Remove internal batteries where required.
- Label cables and take installation photos.
- Clean and dry displays, speakers, and controls.
- Cover fixed electronics.
- Inspect wires, terminals, and connectors.
- Protect dry connectors as directed.
- Fully charge batteries.
- Use a compatible battery maintainer.
- Store safety equipment in a dry location.
- Check expiration dates.
- Inspect transducers and sensor mounts.
- Add moisture control.
- Maintain cover ventilation.
- Record equipment locations and serial numbers.
- Test all equipment before spring launch.
Sources
- Boating Magazine: 9 Tips for Winterizing Your Boat’s Marine Electronics
- Discover Boating: Boat Electronics Maintenance, Care, and Cleaning Guide
- Furuno Marine Electronics Winterization and Commissioning Checklist
SEO Keywords: marine electronics winterization, boat audio winter storage, winterize marine speakers, winterize boat electronics, marine battery storage, boat safety gear storage, marine audio maintenance, boat electronics corrosion prevention
Meta Description: Use this marine electronics winterization guide to protect boat audio, wiring, batteries, navigation equipment, and safety gear during winter storage.
Excerpt: Follow this checklist to prepare marine audio, electronics, batteries, wiring, and safety equipment for winter storage. Includes cleaning, moisture control, corrosion prevention, and spring recommissioning steps.