
Upgrade Your Dashboard: Modern Radio and Head Unit Integration
Understanding Modern Head Unit Integration
Modern head unit installation requires vehicle-specific components that match your dashboard configuration. Aftermarket radios integrate into factory locations through dash kits designed for your exact make and model. This process maintains factory appearance while adding advanced audio features.
Premium head units provide touchscreen interfaces, smartphone connectivity, and enhanced audio processing. Installation requires proper brackets, wiring harnesses, and trim pieces specific to your vehicle.
Installation Kit Components
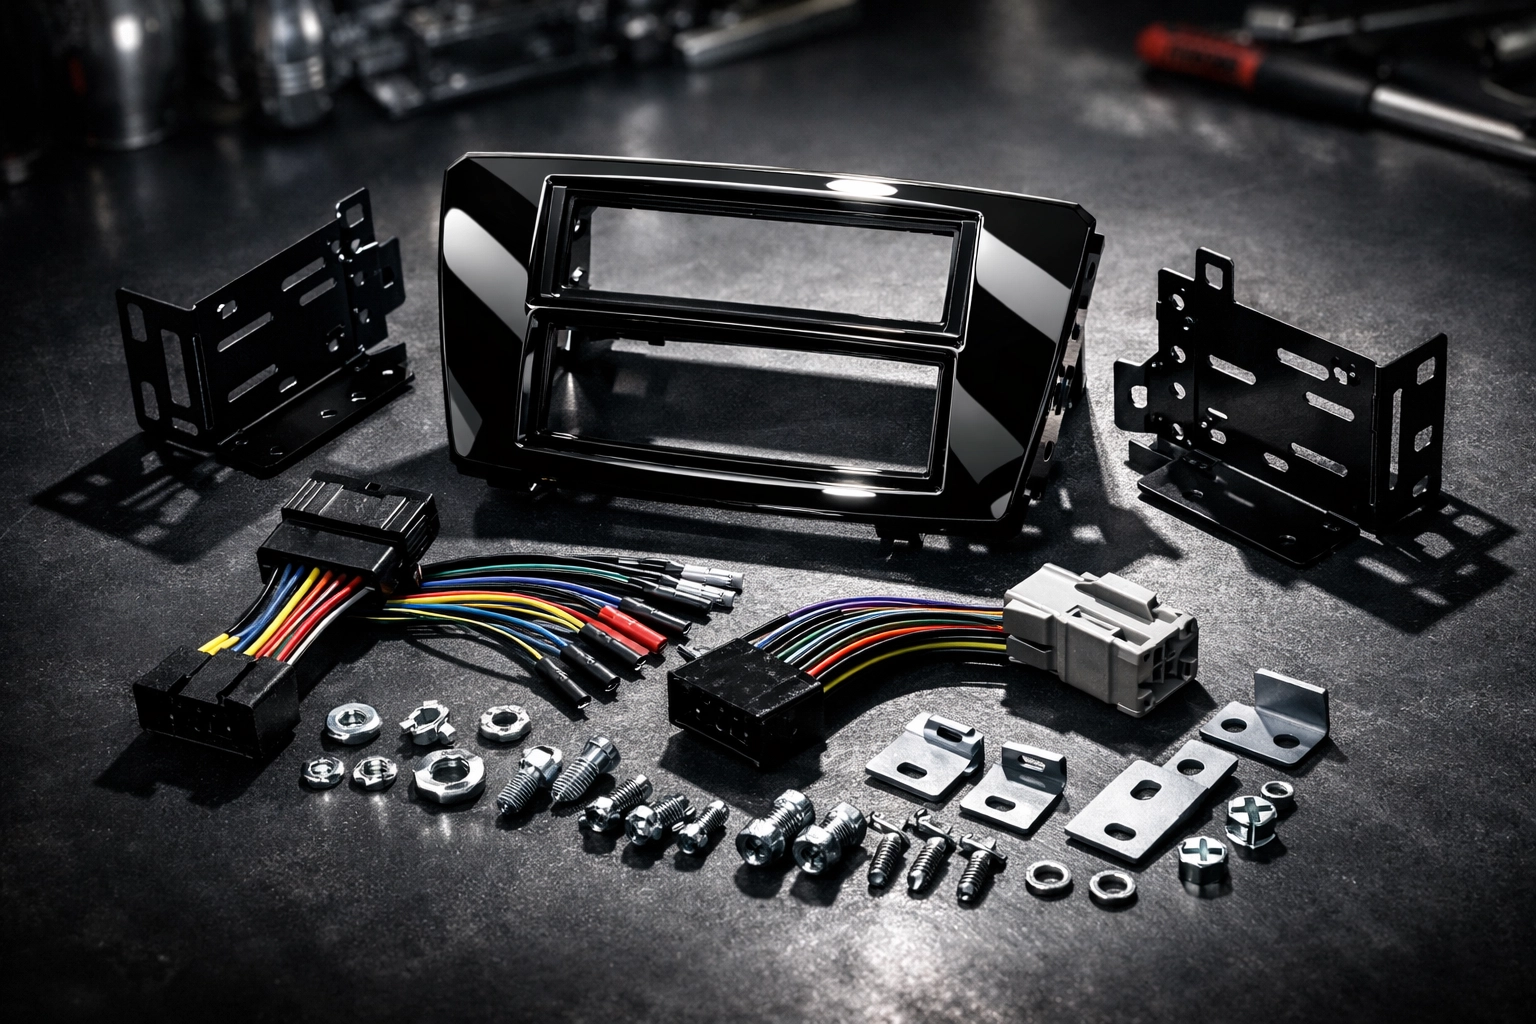
Vehicle-specific dash kits contain mounting brackets and trim plates that fit your dashboard opening. These kits accommodate either single DIN (2" x 7") or double DIN (4" x 7") head unit sizes. Most modern vehicles use double DIN openings for larger touchscreen displays.
Quality installation kits include:
- Mounting brackets contoured to dashboard shape
- Trim bezels matching factory finish
- Hardware for secure attachment
- Wiring harness adapters
- Antenna adapters for radio reception
Proper kit selection prevents gaps around the new head unit. Check your vehicle's year, make, and model for exact compatibility before ordering.
Single DIN vs Double DIN Configuration
Single DIN head units measure 2 inches tall and fit older vehicle dashboards. These units provide basic audio controls and small displays. Double DIN units measure 4 inches tall and accommodate larger touchscreen interfaces.
Most vehicles from 2010 onward feature double DIN openings. Converting from single DIN to double DIN requires specific adapter kits that fill the extra space. Some kits include storage pockets below single DIN units in double DIN openings.
Double DIN head units offer:
- Larger touchscreen displays (6.5" to 9")
- Split-screen functionality
- Better visibility of maps and controls
- Enhanced menu navigation
- Improved camera integration
Single DIN benefits include lower cost and compatibility with older vehicles. Choose based on your vehicle's factory opening and desired features.
Premium Head Unit Features
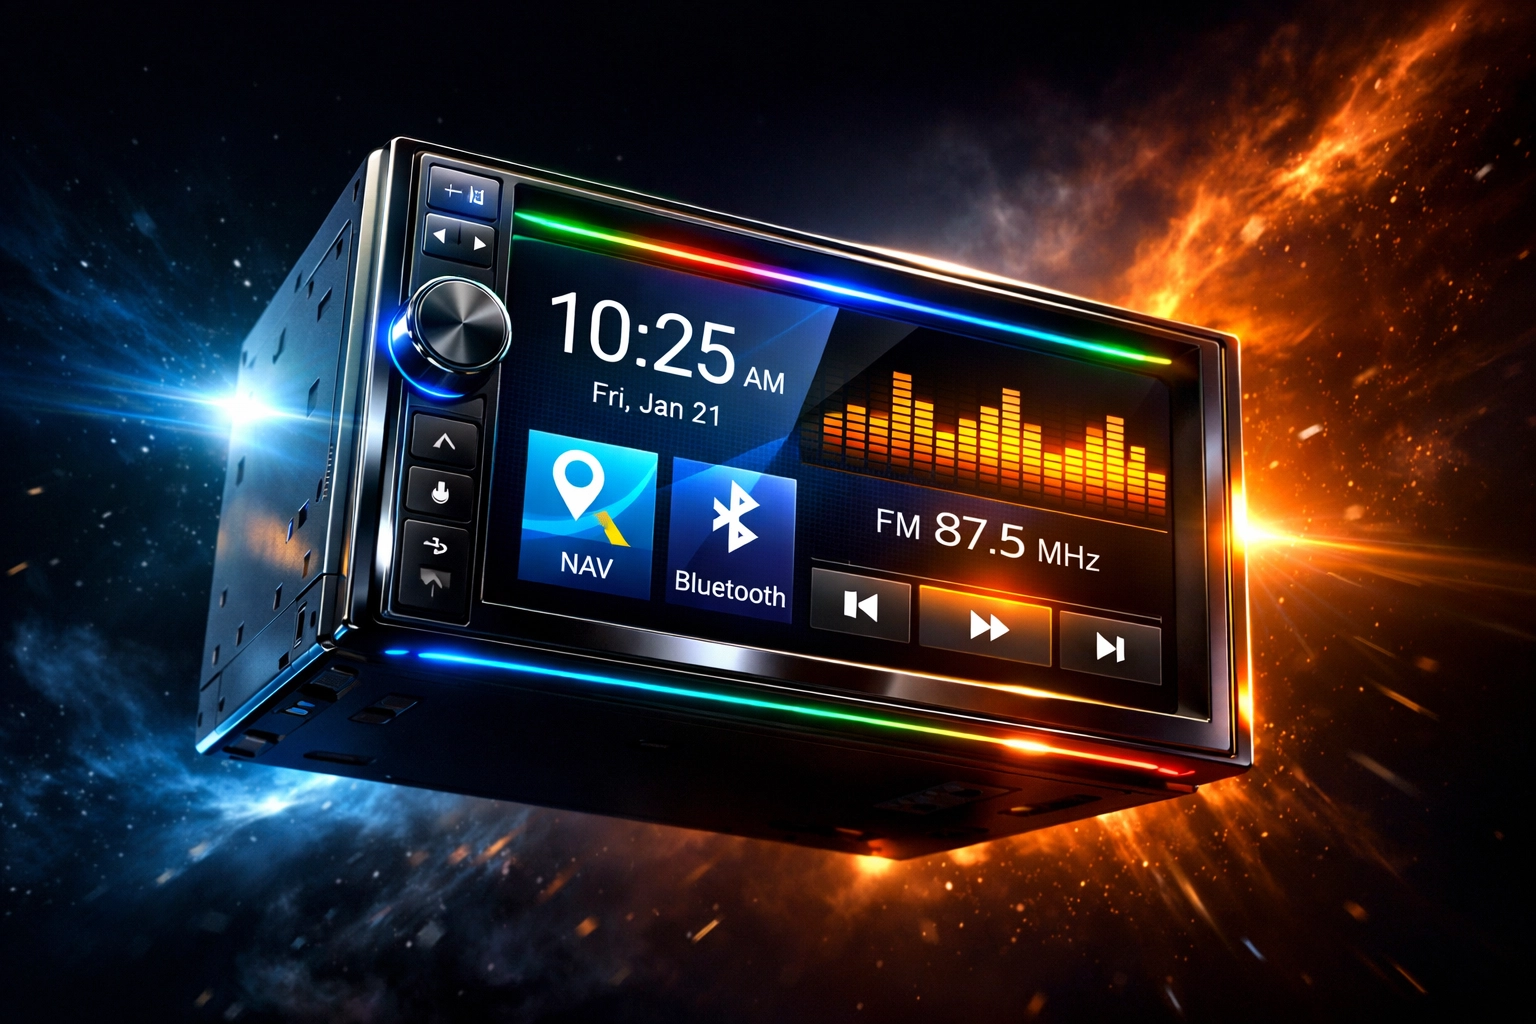
Modern premium head units integrate smartphone systems through Apple CarPlay and Android Auto. These platforms mirror phone interfaces on the head unit display. Voice commands control navigation, music, and calls without touching the screen.
High-end models include built-in amplifiers with clean power output. Quality head units provide 4-volt preamp outputs for connecting external amplifiers. This voltage level reduces noise and improves signal quality to amplifiers and speakers.
Advanced processing features include:
- Time alignment for proper sound staging
- Parametric equalization with multiple bands
- Digital signal processing (DSP) for tuning
- High-pass and low-pass filters
- Subwoofer level control and phase adjustment
Premium brands like JL Audio and Hertz offer head units designed specifically for audio enthusiasts. These units provide professional-grade tuning capabilities and superior audio quality compared to basic models.
Wiring Integration and Adapters
Car audio installation requires matching your vehicle's factory wiring to the new head unit. Vehicle-specific wiring harnesses plug into factory connectors without cutting wires. This maintains resale value and allows reverting to stock configuration.
Wiring harnesses preserve factory features like steering wheel controls, USB ports, and backup camera functionality. Additional adapters may be required for specific features. Steering wheel control adapters program factory buttons to control aftermarket head units.
Retain accessory power, constant power, ground, and speaker connections through proper harness matching. Incorrect wiring causes blown fuses, battery drain, or non-functional features. Always verify wire colors against your vehicle's specific diagram.
Some vehicles require data bus interfaces to retain factory amplifiers or complex audio systems. These interfaces communicate between the new head unit and factory components. Premium integration maintains original equipment functionality while adding new features.
Dashboard Trim and Finishing
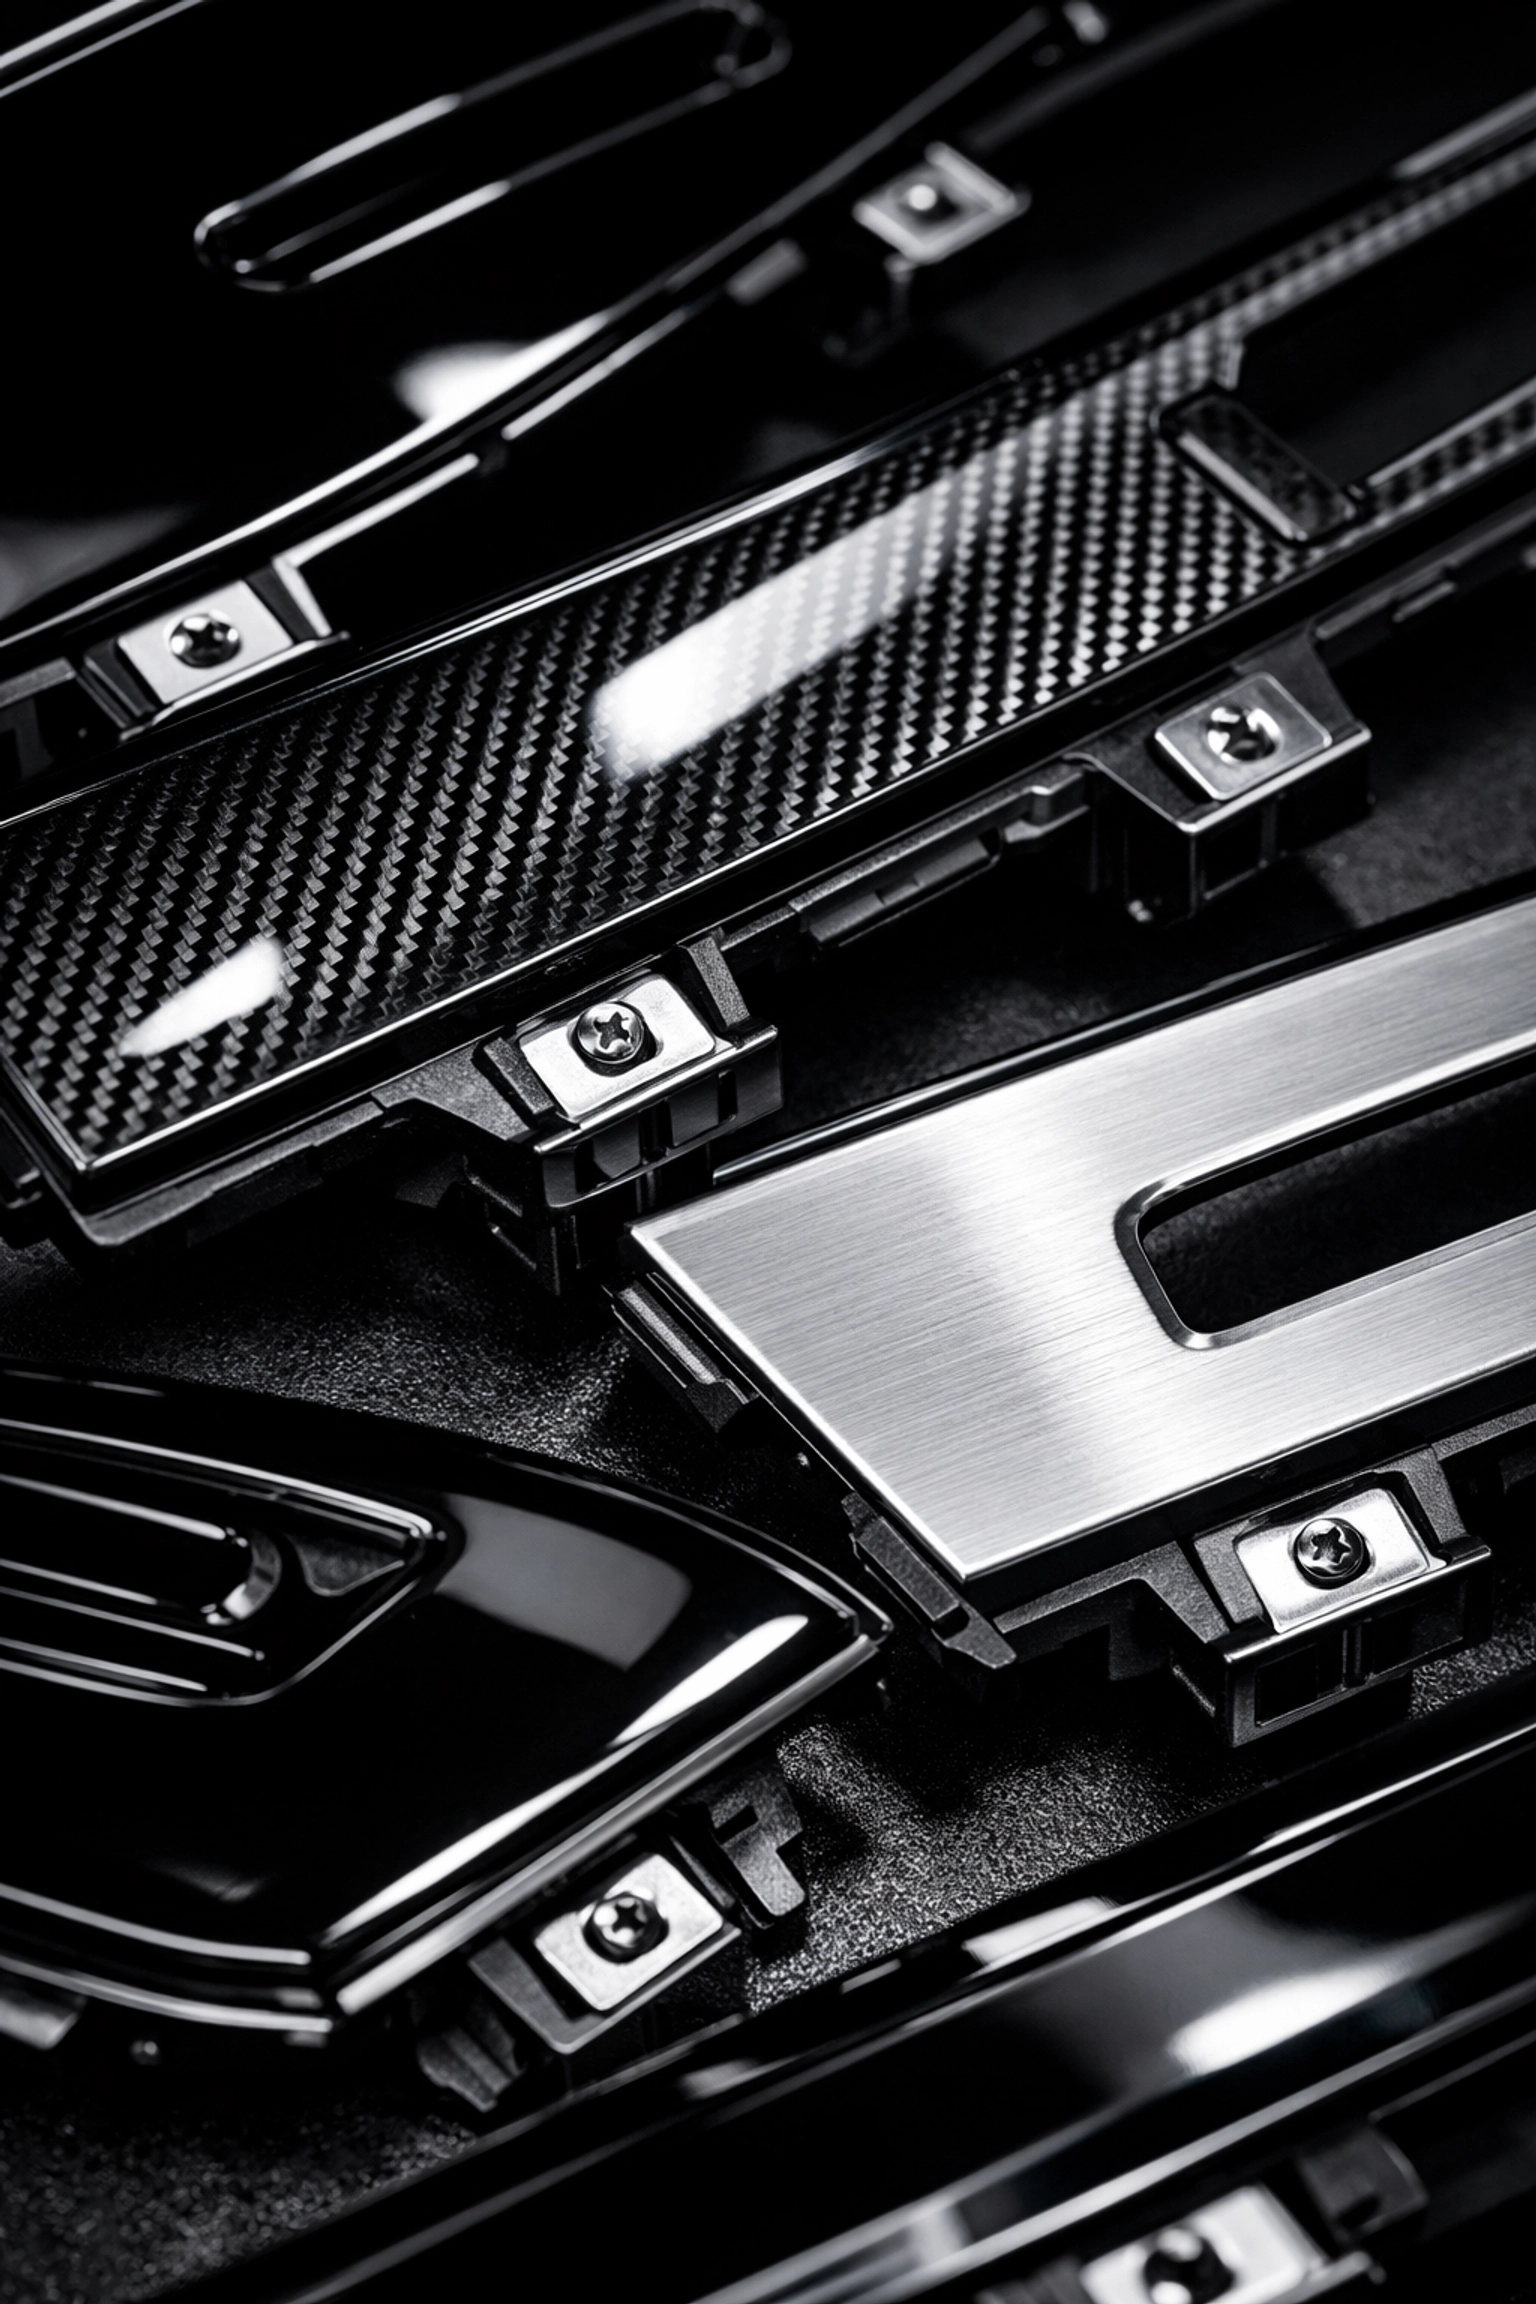
Quality installation includes matching the new head unit to your dashboard aesthetic. Dash kits come in multiple finishes including piano black, textured matte, and color-matched options. Select finishes that blend with factory trim pieces.
Trim rings frame the head unit within the dash opening. Gaps between the head unit and trim indicate incorrect kit selection. Proper kits provide flush mounting with no visible spaces. Test fit components before final installation to verify alignment.
Some vehicles require radio removal tools to access factory head units. These tools release factory clips without damaging dashboard panels. Research your specific vehicle's removal process before starting installation.
Dashboard disassembly varies by vehicle. Simple installations require removing a single trim panel. Complex installations involve multiple panels, climate controls, and shift bezels. Follow vehicle-specific guides for proper panel removal sequences.
Audio System Planning
Head unit upgrades work best as part of complete audio system planning. Consider your entire audio chain from source to speakers. Premium head units maximize performance when paired with quality amplifiers and speakers.
Start with the head unit as your system's foundation. Strong preamp outputs enable clean signal delivery to external amplifiers. Built-in processing reduces need for separate processors in basic systems. Advanced users add dedicated DSPs for competition-level tuning.
Plan power requirements before installation. Upgraded audio systems draw more current than factory setups. Verify your vehicle's alternator and battery capacity support additional amplifiers. Add upgraded wiring for high-current systems.
Brands like JL Audio, Fusion, and Hertz provide complete system solutions. Matching components from single manufacturers ensures compatibility and optimized performance. Premium brands offer technical support for installation questions.
Marine Head Unit Applications
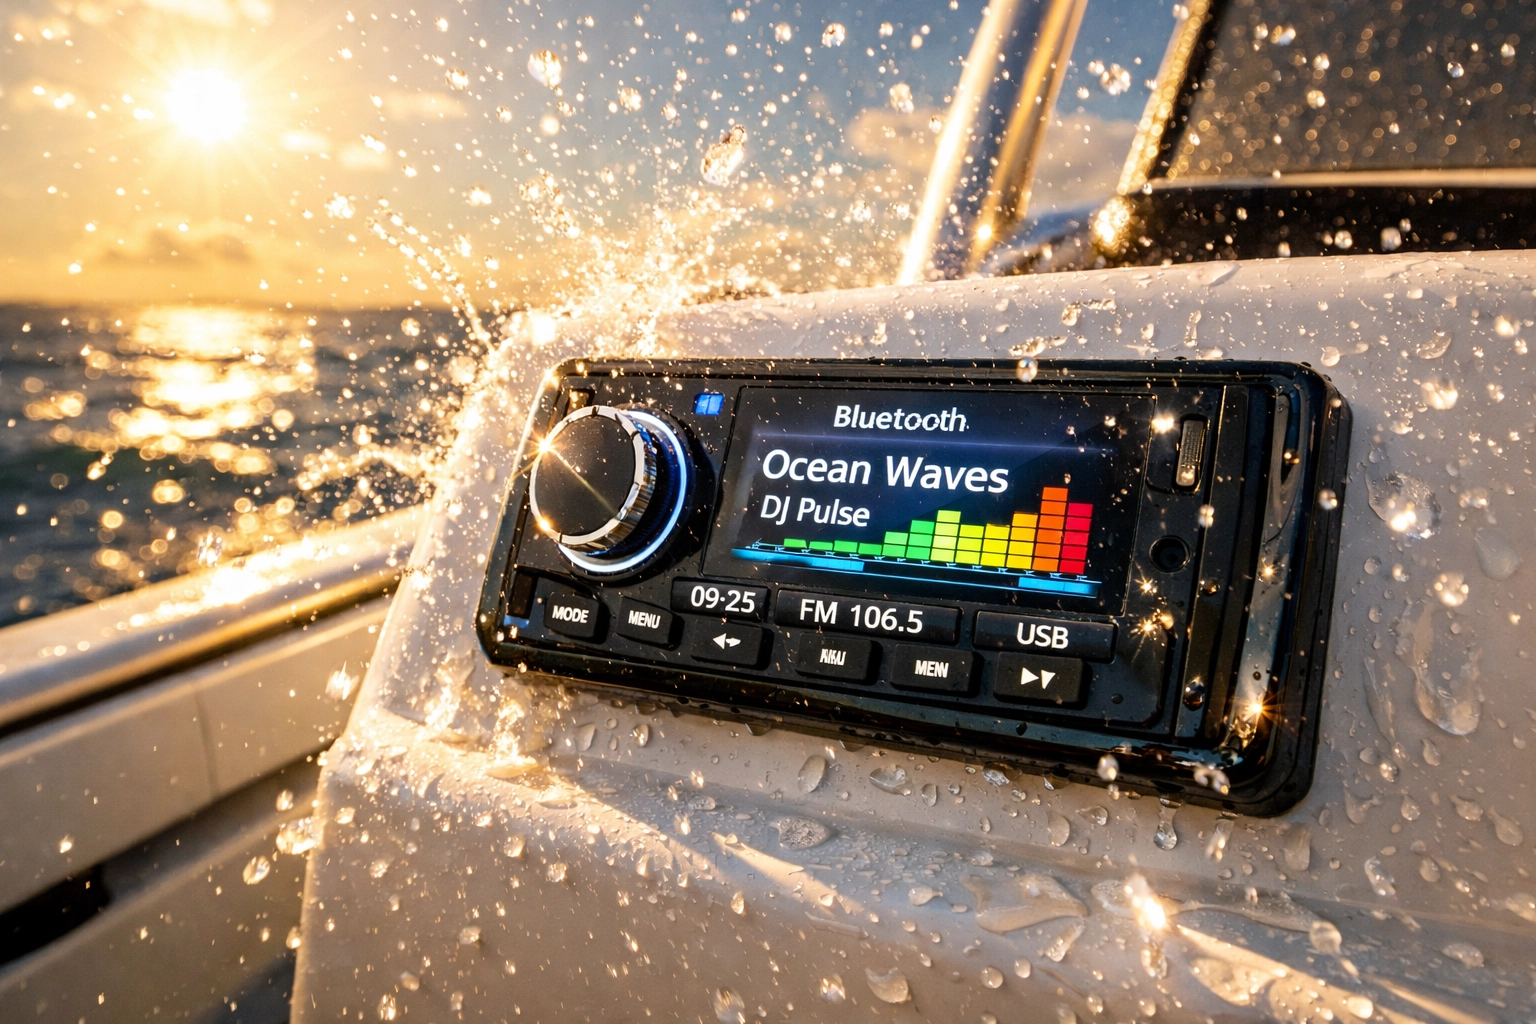
Marine environments require waterproof head units rated for moisture exposure. Marine-grade units feature conformal-coated circuit boards and sealed controls. UV-resistant faceplates prevent sun damage. Fusion and JL Audio manufacture purpose-built marine head units.
Marine installations require corrosion-resistant mounting hardware. Stainless steel screws and brackets prevent rust in saltwater environments. Sealed wiring connections keep moisture from electrical contacts.
Marine head units include features specific to boat use:
- Zone control for multiple speaker areas
- NMEA 2000 integration with boat electronics
- Bluetooth streaming from multiple devices
- Built-in amplification for tower speakers
- RGB lighting control for accent lights
Boat dashboard integration follows similar principles to automotive installation. Custom mounting panels accommodate head units in fiberglass consoles. Verify power supply compatibility with boat electrical systems before installation.
Purchasing and Installation Support
DIY Customs Store ships head units and installation components nationwide to all 50 states. Orders over $200 qualify for free shipping. Browse available head units and installation kits at diycustoms.store.
Premium brands include Linkswell, JL Audio, Fusion, Hertz, and Wet Sounds. Check the outlet section for discounted premium head units from returned or clearance inventory.
Verify product compatibility with your specific vehicle before ordering. Contact DIY Customs Store for technical questions about installation kits and wiring harnesses. Pittsburgh headquarters offers local pickup for nearby customers.
Complete systems ship from our facility with all required components. Package deals include head units, installation kits, and wiring harnesses for simplified ordering. Nationwide customers receive fast shipping through major carriers.
Professional installation remains an option for complex integrations. Many customers successfully complete DIY installations using manufacturer instructions and online resources. Start with proper tools including panel removal tools, wire strippers, and electrical tape.
System Testing and Configuration
After physical installation, test all head unit functions before reassembling dashboard panels. Verify speaker output from all channels. Test steering wheel controls and backup camera if equipped. Confirm smartphone connectivity through Bluetooth or wired connections.
Audio tuning requires time and experimentation. Start with flat EQ settings and adjust based on listening preferences. Use test tones to identify speaker phase issues. Set crossover points appropriate for your speaker sizes.
Time alignment compensates for different speaker distances from listening position. Measure distances from each speaker to driver's seat. Input measurements into head unit's time alignment settings. This creates proper soundstage and imaging.
Save tuning presets for different listening situations. Create profiles for different passengers or music types. Premium head units store multiple preset configurations for easy switching.
Document your installation with photos and notes. This helps with future modifications or troubleshooting. Keep installation manuals and wiring diagrams for reference.
SEO Keywords: car audio installation, head unit upgrade, dashboard integration, aftermarket radio, car stereo installation, vehicle-specific dash kit, double DIN head unit, premium car audio, audio system integration, head unit installation kit
Meta Description: Install modern head units with proper dashboard integration. Learn about installation kits, wiring harnesses, and premium features. Free shipping over $200 nationwide.
Excerpt: Modern head unit integration requires vehicle-specific installation kits and proper wiring adapters. Premium head units provide touchscreen interfaces, smartphone connectivity, and advanced audio processing for upgraded sound systems.